Saturday, August 30, 2008

Session Cinque (5)

We will be meeting at Sunrise Hills Cemetary off of Willamette 4:30 pm to 7:30 pm (sun is setting earlier).

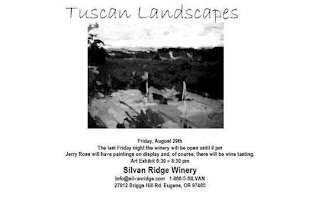
Note: Exhibit at Silvan Ridge Winery is being held over through September if you still want to see it. Also this Sunday, 2 pm - 5 pm a big crowd is expected for wine tasting and Richard Quigley's art exhibit (watercolors of Tikis), if you want to come out.

Before starting this session's lesson, let's review again the color pool concept with the benefit of some photos taken by Hugh:


Note the use of an old canvas as a palette which is sometimes a good idea because you have a bigger surface to work on and the colors show up nicely when you create the mix. By placing white somewhere near the top of the pool you can access white and mix it into the pool as needed.

THIS WEEKS' TOPIC: Creating Atmospheric Perspective
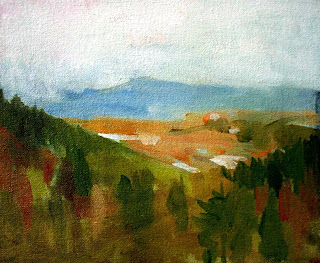


Each of these works creates a distant view, an added perspective, through the use of atmospheric perspective. To give the works a sense of the third dimension, colors become cooler in the distance and an object becomes lighter in value.

Many plein air painters say they are not really painting objects but rather air and atmosphere. The idea is to try can capture the atmosphere present and not to attempt to make a cloudy day into a bright cloudless one...try to capture the moment as it really is before you. Many of the works of Signorini and other great I Macchiaioli painters are depictions of merky or very atmospheric days. As Fall approaches and we have rainy or overcast days can actually be opportunities for you to paint atmosphere. Here is another example of a painting done from our last painting location at LCC that has an interesting cloud-filled sky:
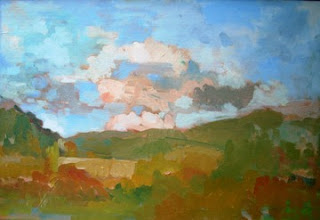


"View of Mt. Pisgah" (featured in DIVA exhibit opening Friday, Sept 5th)

If you are painting on a grey day, it is more important to present thr mood and feeling of that kind of day than to draw too much or paint too much detail. Use large and simple masses. Simplify shapes into a few brush strokes. Mute your colors and crreate soft edges by paining wet into wet and value into value. You can paint the sky first and then paint the distant hills into the wet sky. The two layers of paint will interact bluring the sharpness of the brushstroke and lightening the values.

Assignment: Go out painting on a cloudy day and try to emphasize these techniques of atmospheric perspective. Remember that it is much more than painting the distant hills blue or using lighter values. Don't let your large masses and shapes break up into myriads of little dabs. Group your lights and darks so that the painting has a focal point. Try to direct the viewer to one or two spots on the painting. But as you do this pay attention to the difference in colors near and far away. Use greys and smaller brushstrokes for the distant areas.
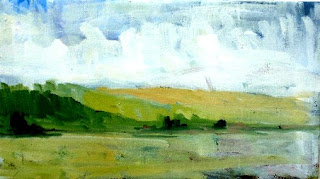

"Amazon Park"
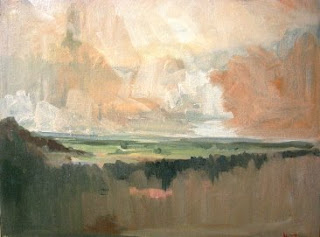

"Oregon Coast"

Note: the exhibition at Silvan Ridge has changed -- thanks to all who made it out there -- you can see the Tuscan landscapes, however, during the DIVA studio tour in October.

FYI: In case you haven't seen it yet, this months Alternatives Magazine is featuring my artwork on its cover. Its a portrait not a landscape, but you might want to pick up an issue. Here is a link that shows the cover:

http://www.alternativesmagazine.com/47/fall08.html

Monday, August 25, 2008

Session Quatro (4)

We will meet at LCC near welding shop one more time:


In case of heavy rain head for Maude Kerns.

Firstly, to review color poolo mixing concept:


The exact placement of the colors making up the color pool does not matter that much. In this picture you can see I have switched the location of yellow and red.
The idea is to have two separate mixes of complements (warm yellow and cool blue, on he one hand, and warm red and cool viridian on the other end). If you switch locations of red and yellow then the mixes are different (warm red and cool blue, on the one end, and warm yellow and cool virdian on the other). In any case, you get a lot of neutrals in the mix of complements, especially when you add white.

Note that the pool is dominated by the two different complement mixes. Each os the mixes creates a set of neitral tones that can be made warmer or cooler by addition/subtraction of an appropriate amount of the complement involoved in the mix.

New Topic: Gesture and Perspective in Landscape Painting

In order to create an interesting landscape painting in plein air, it is important to capture the gesture and perspective of a scene quickly. By "gesture" I mean the same thing as when painting from the nude when we capture the gesture of the body in a few strokes. Landscape also has its gestural movement which can be captured by paying attention to main diaglonals, horizontal, and vertical lines:

Note: eye movement and gesture are created at the very start when a very simplified drawing is created. In this initial sketch we are still looking for "effect" or the dramatic (dal vero) impact of nature as well as your feeling and your own sense of empathy for and with the scene:

Note: look at the diagonal movement indicated by the arrows. One must keep an awareness of the overall slope and movement of the scene by discovering the main pivot lines, horizontals and verticals and sweeping diagonals which aid in recreating the energy and power of the scene.

When sketching like this, deliberately exaggerate and emphasize the dramatic elements, especially shapes of the cloud masses that give the scene movement. Even on a cloudless sky I sometimes introduce clouds that are not there for this purpose:

After we study and discuss these preliminary sketches we shall look at painting examples along the same lines. Your success as a plein air painter will depend on your ability to capture the gesture and movement (energy) of the scene.

Example in painting:
Here is how I approach creating a Tuscan landscape with eye movement and gesture in mind:

Note the diagonal created with paint -- the brush comes right out of the color pool mix and does not have a single color on it. Notice the "point/counter-point" with the two opposing diagonals that play with one another and give the painting tension:

This diagonal is strengthened by adding some dark green accents:


Starting a painting of the Tuscan town Cetona, with gesture:


Assignment for thursday: When you arrive on the scene please try to begin with gesture painting without preliminary drawing this time. Paint wet in wet and try to discover the scene through gesture and movement. Look for strong diagonals, verticals, and horizontal formations. Piant with as big a brush as you can and avoid any details until later. Establish your color pool first.

Friday, August 15, 2008

Session Tre

We will meet next Thursday, August 21st at the LCC parking lot. Turn at the traffic signal and go straight until you reach the Welding/Industriual Arts building...look for my red pickup truck.

In case of bad rain we head for Maude Kerns -- bring a photo to work from.

I intend this post to be about color mixing, the subject for the third class session. But first and until I can get to that, let's discuss the idea of alla prima, painting wet into wet paint. If you were in class tonight (August 14th) you saw me painting in this manner -- and I was recommending students give it a try, which most did. Here is the idea:

Use an underpainting (imprimatura)of Titanium White and and Burnt Sienna -- mix it into a light pink consistency and apply it with a brush using either pure thinner or the mix of linseed oil and thinner. The latter may give the best results because some oil seems to help the process.

The general idea is that the wet into wet technique helps unify the painting and makes the sketch more like a "finger painting", namely loose and free. Here you can see the beginnings of a sketch made with a #1 filbert brush using a slightly darker sienna mix.


Next, carry out your sketch:


Further elaboration:


A more finished version (re-started):


Although this wet-in-wet approach can produce more "painterly" results, one often has to pay close attention to colors, which can get too muted when too much sienna is present in the primatura. By using less sienna in the underpainting and the proper amount of medium (not too much oil) one can get exprssive colors as well as expressive brushwork, but it takes some practice to get it right:


The theory of color pool mixing comes from Charles Movalli and Roger W. Curtis, two east coast plein air painters, who wrote the book "Color in Outdoor Painting" (Watson-Guptil c. 1977). Their idea was basically this: analyze the colors in the scene you are painting, select pgments from your paint box to produce those colors you are seeing, arrange these colors on your palette using overlapping rings of colors that form a "color pool" in the center of the palette, slowly working the colors together but not blending them into one color.


Assignment: Prepare a color pool as indicated and attempt to paint from it. Arrange your palette like this:


Notes: Place your colors across the top of your palette with warms to the left and cools to the right...ultra blue will go to the right and burnt sienna will go to the left. You can place white down the side.

Then in the middle, select the colors you want to use for the pool. If your subject is mostly warm (say a lot of warm greens) then try to paint the scene with just the three pigments indicated plus white. Pick up yellow with the brush and place it in the center of the palette as indicated. Clean the brush and do the same with ultra blue and also with cad red. It is recommended to start with th "weaker" colors first. These are the ones with little tinting power. For example Alizarin Crimson and Verdian and Burnt Sienna are strong and dominate other colors.

Slowly working the colors together they will mix accidentally (do not blend them into one homogeneous color) and the result will be a variety of different colors (for example many different greens if you mic yellow and blue). The colors nearest blue will be blue-green and the colors nearest yellow will be yellow-green.

The Importance of color: I have already stressed the importance of value, that is, darks and lights. Next in importance to painting is color. Colors will differ depending upon the season and the time of day. Therefore the color pool will come to be domainated by different colors depending on these factors. After establishing the macchia (principal masses and values) you next need to establish the warm and cool relationships of the colors.

When blocking in the big divisions (zones) of your design, use broad areas of color:


Beginning oil sketh of Fiesole, Italy

As the painting progresses, these main areas are changed by seeking out the variations within each zone through careful observation and painting from the color pool. Often trees are painted last, worked into the wet background and sky. Here is an example of a finished wet-in-wet painting:


"Tuscan Winery" oil on canvas 2008

Thanks to all the students who were able to come to class last night (8-21). Here are some additional notes regarding what we discussed in the field:


Note that in my actual demo I may have modified this a bit, switching the locations of the red and yellow. Also note that you can have yellow ochre and alizarin crimson on the periphery as needed. Also you may need a separate place on the palatte or a separate palatte to mix sky color to avoid any muddiness.

My work done on site yesterday:


-- Jerry

Saturday, August 9, 2008

Session Due

We will begin session two outdoors at the Brackenfern Street site (drive past the Lane County dump entrance heading south past the new Hotel at the end of Glenwood Drive. Go straight ahead on Brackenfern until you come to the first interesection). I'll try to add a map below. In any event, we will begin at 5 pm on August 14th and will go until it gets dark (around 8:20 pm). Bring a jacket and a cap in case weather gets difficult. In case of rain we will meet at the MK Art Center.

Drawing and Composition:

I will begin this post by discussing drawing and composition. Here are a series of drawings I made on a trail near Spencer's Butte:


Notes: Hold your pencil to the side when you draw and try to make the overall drawing light. As you can see above (pencil on paper), try for subtle changes in pressure as you press the pencil down...lighter for distant areas. You can see some subtle colors added as well.


I will add a more thorough discussion of drawing and composition here on my next update of this post.


Now back to establishing the drawing in paint (remember the macchia?):


Adjusting the drawing and adding color:


Starting over using direct painting (little or no underpainting Macchia, just remembering previous drawing and [painting directly with colors):


The importance of drawing cannot be emphasized more. If you cannot produce an Accurate plan for your painting (drawing) you will probably struggle while attempting the painting. Here is another example, this time the location is the view from Silvan Ridge Winery. The first sketch is very loose and scribbly and the second is more detailed. They are both done with graphite pencil on paper:


Next, let's look at the resulting plein air painting. Firest I will show the black and white version so you can study the values:

Next the color version of the same painting:

By the way, this and other works will be on display at Silvan Ridge Friday, August 29th, 5 pm to 8 pm at the winery. Music...wine tasting and buying...paintings.

Assignment:

Look at some web sites on Constable, with an emphasis on his drawing:

http://www.vam.ac.uk/school_stdnts/schools_teach/teachers_resources/constable_resource/index.html
When you get to the plein air site on Thursday, spend the first 30-45 minutes doing a pencil sketch on paper before attempting the painting.

Here is a Constable study I did recently:


And the painting after Constable: